
How To Properly Set Up & Use a Record Player
Record players offer a truly unique way of enjoying music. They’re old-fashioned machines with high-quality sound. Newer models make the best of this by adding new features that enhance the sound and make the mechanisms easier to use.
It can still take a bit of time to get used to operating a record player, especially if you’re used to streaming music online at the click of a button. That’s why we’ve put together this guide on properly setting up and using a record player if you’re a beginner.
Parts of a Record Player
If you want to set up a record player, you’ll need to start by knowing all of its parts and making sure they’re set up correctly. Here’s a list of the important parts of a record player, along with descriptions of what they do and how to make sure they’re set up properly.
Plinth
The plinth is the foundation of your whole record player. It’s the squarish base that all the other parts of your turntable rest on or are connected to. Make sure your plinth is resting solidly on a sturdy table or a turntable stand.
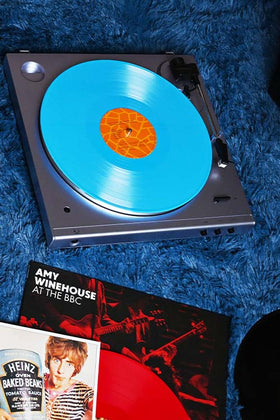
The Platter
The platter is the circular, spinning part of the record player. It’s what you put your record on to spin and play under the turntable needle. It’s usually made of metal and covered with a circular piece of a softer material, called a turntable mat.
The Tonearm
The tonearm is the long arm that protrudes over the platter and holds two vital pieces of the record player; the needle and the cartridge.
The needle is diamond-tipped and is the part of the record player that reads the grooves on the vinyl itself. It runs along those grooves while the record spins, creating vibrations that are processed through the cartridge.
The cartridge turns those vibrations into an electrical signal that is sent to the record player’s speakers, where it is output as music.
If you have a manual record player, you’ll need to use a cue lever to pick up the tonearm and place the needle on the record to start playing it. Automatic record players have a mechanism that does this for you manually. Some turntables are even semi-automatic, meaning that you have to place the needle to begin the record. When the record is over, the arm will automatically lift when the record stops spinning.
Before using your record player, you’ll need to balance your tonearm and set the tracking weight. This means setting up the tonearm and the needle so that they rest on your record with the correct amount of pressure to create a good sound without damaging your vinyl. You can do this by adjusting the anti-skate control on your turntable to match the recommendations given in the instructions for your specific turntable.
The Speakers and Preamp
Many record players have a built-in preamp, which amplifies sound before it gets to the speakers. Using a record player with the preamp built-in makes getting your record player set up more straightforward. However, if you’re an experienced audiophile, you might want to purchase a separate preamp to tailor the sound to your liking.
Either way, the preamp connects to your speakers. Built-in speakers are easy to use — you plug in your record player, put on a record, and you’re good to go. They’re also limited in their audio output. If you want a more serious listening experience, you may want to set up your own speakers.
If your record player has a built-in preamp, plug your separate speakers into your player using the RCA cables. Fortunately, RCA cables usually match the correct sockets by color. Plug the red cable into the red socket and the white one into the white socket. Then you’ll be ready to play music at a higher volume and with a more complex sound profile.
If your record player doesn’t have a built-in preamp, you can still use your own speakers, but there’s an extra step. First, connect your amp. Then connect the speakers to it, not to the record player. Again, the cables are generally color-coded for your convenience, and it’s a pretty simple setup once you get the hang of it.
If none of this makes sense immediately, flip through the instruction book that came with your record player and look for diagrams and pictures to help you understand how the pieces all fit together.
Modern record players also tend to have lots of other audio features, such as Bluetooth connectivity, so it’s best to customize your speaker arrangement based on what your specific record player is capable of doing.
Belt or Direct Drive
There’s one other thing to think of, especially if your record player is vintage. There are two types of turntables — direct drive and belt drive.
While direct drive turntables are essentially ready to use out of the box, belt drives use a different arrangement that takes a bit of setup. Direct drive turntables have a motor underneath the turntable. That motor turns the platter of the record player and essentially powers the entire listening experience.
Belt drive turntables also have motors, but they’re placed away from the turntable platter to reduce mechanical vibrations and produce a cleaner sound. The motor on a belt drive turntable is connected to the platter by a belt that needs to be installed by the user before you can play records. Without the belt, the platter won’t spin, and the record won’t play. Fortunately, installing the belt is easy to learn with a little practice, and you really only have to do it once every five years or so.
Now that we’ve got a good idea of how all of the parts of a record player work and should be set up, let’s talk about the easy part — playing a record.
How To Play a Record
Playing a record is the easiest part of the setup process. You can do it in the following five simple steps.
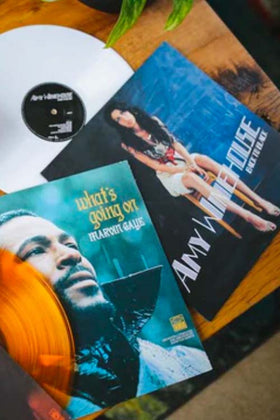
- Pull the record from its sleeve. Be gentle! Don’t touch the grooves, and handle it gently from the edges with very clean hands.
- Place the record carefully on the turntable. Make sure the spindle is going through the hole in the middle of the record and that the record is lying flat.
- Check the speed of the record and adjust the player so that they match. 12-inch records are usually 33 ⅓ RPM, while 7-inch singles are 45 RPM. Look for a switch on the plinth that you can use to change the speed.
- Use the cue lever to raise and lower the tonearm. Place the needle carefully at the beginning of the record’s grooves for the first track. If your turntable is automatic, it will do all of this for you.
A quick tip: If you want to skip tracks, it’s not as easy as playing an mp3 or CD track. You’ll need to carefully look at the record’s surface for the darker, flatter sections of the record, which indicate the silence in between each track. Using the cue lever, raise the tonearm and lower it in one of these sections. It takes practice to get just right. Look carefully and be gentle so you don’t accidentally scratch the surface of the record.
- Find the record player’s on button, and switch it on. Enjoy your music!
Final Tips To Set Up a Record Player
Be sure to set your record player on a sturdy, level surface. Make sure the table that your player is on isn’t wobbly or uneven. Playing a record on a tilted record player can result in poor sound quality or, worse, scratches on your records.
Keep your records and turntable clean. Dust, grease, and even the oils from your skin can cause damage to your records and your record player.
Enjoy your music! Listening to records on a record player is a unique experience. Records, as an analog format, have a rich, full sound that is hard to find in digital music formats. Once you’ve set up your record player properly, be sure to use it to enjoy your favorite tunes. If you’re not sure what sounds good on a record player, check out our selection here at Sound of Vinyl.
Sources
How to set up a record player | TechRadar
How to set up and maintain your turntable for analogue audio joy | Wired
SAA Dictionary: analog | Society of American Archivists. SHOP UK STORE
 SHOP U.S. STORE